Monday 1 January 2024

Happy New Year 2024 - and new project ideas


I haven't posted on Blogger for a while. Compared with Facebook, it is more fiddly to do, and to add photos, plus with all the work of maintaining more than half a dozen Facebook groups, and my website news letters leaves me with now much time over for writing up more here. But it is always easier to find things later on a blog, and it is a very handy place to host photos etc.!

Rather than trying to do a huge recap, I'll just jump in where I'm at now.

I have been thinking about the idea of a temperature quilt in sashiko ever since once of my former Stockton sashiko students mentioned it. Today, I added a fabric pack to my website's 'Twelve Days of Christmas' special sales event that I've put together for a sashiko temperature quilt. Since I was sorting out fabrics for myself, I figured I might as well do packs for sale!

I chose twelve Kofu Tsumugi fat quarters shading through from cool blues to warm reds and purples, via greens and yellow, to make my version of a 'temperature quilt' in sashiko - using one 3 1/2in square per day, the fabric representing the daytime high temperature, and the sashiko thread shading in colours to represent the night time low temperature.  Using one fabric colour for three degrees, there are enough colours to allow for a variation of 36ºC, but if you live in a place with less variation, like I do, you could use one colour per 2ºC increment instead. More about that in a moment!

How do you work out the colours for a temperature quilt? You could record the daily high and low temperature yourself (that's the most work!), or take the information from online weather forecast sites like accuweather.com which has historical temperature records for many locations worldwide. temperature-blanket.com is very helpful, including more links to historical temperature records but also having visualisation tools where you can choose colours (from knitting yarn swatches), temperature increments, and a blanket/quilt generator so you can get an impression of how your quilt is going to look. Of course, if you think the temperature range where you live isn't very dramatic (ours isn't!), you can always use a different location. I'm planning to make mine using the temperatures from Shōnai, Japan, where I used to live, which is warmer in summer than Perthshire, but slightly colder in winter.

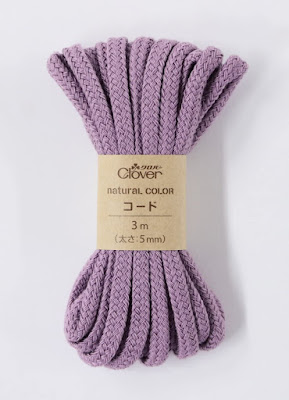
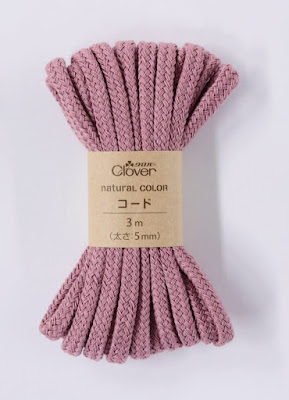
Colours I chose are (cold to hot) - deep blue purple 2508, indigo blue 2008, teal blue 2507, light blue (slate blue) 2506, dark green 2004, green 2505, light grey (taupe) 2501, mustard yellow 2007, russet 2503, brick red 2002, deep red 2003, and bright purple 2513. Depending on the temperature variation where you live, you may need a little extra of some colours.

If you live somewhere with a very wide variation in daytime temperatures or you want to use one fabric per 2ºC increment, you could extend the number of fabrics with a second 'extender' assortment, with various greys and a softer pink and lilac. Since Olympus brought out the new shades in the Kofu Tsumugi range last year, it is possible to have enough shades to do this.

Kofu Tsumugi is a richly coloured yarn dyed tsumugi cotton fabric from Olympus Thread Mfg. Co., good for sashiko, patchwork, bag making and other projects.  It is the same fabric used for my pre printed sashiko panels. The coloured warp and black weft gives this fabric a deep colour, with little slubs to add texture and character.  The weave is loose enough to easily stitch sashiko with fine or medium sashiko threads but close enough to be able to do quite fine patchwork piecing. Ideal for wearables, furoshiki wrapping cloths etc. I've used it again and again. It was the fabric I used for the kasuri and sashiko kamon crest sampler I made for Japanese Quilt Blocks to Mix and Match over 15 years ago, which shows it is good for fine piecing as well as for sashiko.

Next, which blocks to choose? I wanted fairly simple ones. I don't think there's much chance of me stitching one block per day, and I'll probably be doing them in batches, but I liked the idea of cycling through seven different designs - one for each day of the week. I wanted simple designs that would work nicely on the smaller 3 1/2in square format, but still look like there was enough variety to give interest. I'll probably mix them up a bit more, so I don't have two squares next to each other for example, but these are the seven I've chosen (photos edited from my blocks for Sashiko 365).

To make the maths easy and have the designs fit nicely, I am using a mixture of imperial and metric for the marking.

 1) On a 1cm grid -


2) On a 1.5cm grid (this is a quarter of the original design over 8cm, so each section will end up with three stitches rather than 2).


3) On a 2cm grid, so slightly smaller than here, which is on a 1in (2.5cm)grid.


4) On a 1/2in grid, so finished motif is 2 1/2in across.


5) Using a 6cm circle and a 3cm grid.


6) On a 1.5cm x 3cm grid. This asanoha (hemp leaf) motif is on a 2cm x 4cm grid. 


7) The other version of shippō (seven treasures), using the 6cm circle and 3cm grid again.


Other than the changes to grid and circle stize, I will be stitching these the same as in Sashiko 365, but I will be using medium sashiko thread to get the colour range I want for the shading. Planned colours are 100m sashiko thread in #112 turquoise, #108 light blue, #101 antique white, #115 creamy white, #102 cream, #106 yellow ochre, #111 golden yellow. Between #102 and #106, I'll include #A7 mellow yellow. #A4 baby blue might also make a good transition between #101 and #112.

I will try to post some photos once I have a few squares stitched.

Tuesday 19 September 2023

About time I started blogging again!

Sorry for the long absence! I seem to be so busy with so much other online stuff these days. Keeping my website www.susanbriscoe.com up to date and running a mail order business takes a lot of time, and a lot of the material I probably would have used here previously ends up in the form of my website newsletters - so that's one copy and paste job I could do to 'feed the blog' a lot more. If you want to be kept up to date with news, it is best to join my newsletter.
 
I'm also very busy with the sashiko, kogin, and boro inspired groups I run on Facebook, plus a dolls house group, the Welsh quilts group, and the World Textile Day group on FB... and then there's Instagram, where I'm always forgetting to post photos!

My plan is to start using my blog for step by step photos of sashiko pieces I'm stitching, plus getting back to the sashiko sampler quilt project.

The most recent panel I've finished is 'Honeycomb', one of the Olympus 'la bouquetière' hanafukin sashiko sampler series. Although I arranged my thread colours slightly differently from the kit version (above), I chose similar colours (see the step by step photos below). I was thinking of chocolate honeycomb candy, horrible gooey, crunchy stuff that my dad used to love! Olympus also made the pink and lilac version below.
 

You can really play around with different colour and thread combinations on these panels.

The number in the black dot on the packet tells you how many 20m skeins you would need to stitch the panel in just one colour... of course, you need to allow a little more when you start playing around with different colours!

What is a hanafukin? Find the answer here.

They all have instructions on how to stitch them, in Japanese, with very good diagrams. Sometimes when I'm stitching these, I use a different stitch sequence to get the thread colour effect I want. This is how I stitched the panel (below).


This is how the border section looks from the back, when the first rows have been stitched.


I like to stitch hanafukin panels through one layer of fabric only, so the slightly messy back can be hidden with the backing panel!

What has been happening?

After getting my Relapsing Polychondritis (RP) and Rheumatoid Arthritis (RA) diagnosis on the same day in April 2021, I've been on various medications to try to control my symptoms, and we seem to be getting somewhere now I'm on a biologic (Infliximab), so the Methotrexate has been reduced, and (thankfully) I'm tapering off steroids. Fingers crossed everything will settle down. I don't have the energy levels that I used to but I'm still getting lots done. I had a lot of problems with post herpetic neuralgia after shingles in October 2021, and in October 2022, I ended up with the first of two fractured vertebrae, thanks to a combination of long term steroids and two accidents involving large amounts of heavy fabric bolts. But all is much better now.

These days, I mostly take photos of work on my phone, and it can be a fiddle to put those onto the blog. Google, in its wisdom, axed the Blogger app a few years ago, so I have to upload photos by using the website edit feature on either the phone or iPad. They usually end up in the wrong order...! But with abit of tweaking, they will make sense. So I will add some in a moment.

Anyway, good to be back here!

Wednesday 16 February 2022

Making drawstring loops for a Japanese style bag


Many traditional Japanese komebukuro (rice bags) or kinchaku (drawstring bags) have a series of cord loops around the top, instead of having a drawstring channel. I have several antique bags in my collection with this kind of finish. These loops are very easy to make, but you do need a good strong cord to make the loops - a fine synthetic chainette or the 'Asian' cord sold for making decorative knotwork is ideal (now available from my online store). 


The loops on the antique bag above seem to be knotted, but this is how I like to make them -


Tie a double knot in the end of the fine cord and thread a large, sharp needle with it.  To start sewing the loops at the top of your bag, take the needle and cord up between the lining and the outer fabric at the top edge of the bag.  Push the needle through the fabric, to come out about 3mm (an eighth of an inch) below the top of the edge on the outside of the bag. Pull the cord through the fabric - it may need a bit of a wiggle!  Stitch back through the top edge of the bag in the centre of the next chirimen strip, from front to back.  Bring the needle back under the long cord loop you have just made(from the back to the front) and stitch through the fabric again, this time from back to front – as if making a blanket stitch, and then a reverse blanket stitch, bring the needle up through the loop you have just stitched and tighten up the stitch.  Make another long loop and continue around the top of your bag.   The loops should lie almost flat along the top edge.  Secure the last loop in place but do not bring the needle through to the right side at the end of the stitch.  Take the remainder of the cord through to in between the bag outer and lining, and secure it with a double knot. 


These are some of the fine cords I'm listing on the website today. The cords are polyester, very strong and won't break easily. The XL sashiko needle from Olympus is ideal for stitching these cords through the fabric. I also have thicker cords suitable for drawstrings. The perfect finishing touch for your Japanese style drawstring bag!


Tuesday 1 February 2022

Back after a long time!

 I haven't been posting here while I've been getting the Relapsing Polychondritis under control. I now really understand the 'spoon theory' re energy and fatigue that I've heard about from friends with ME, MS, Fibromyalgia, and other long term conditions! So I haven't got as much done in terms of new quilts - my sashiko sampler quilt along ground to a halt once I'd got several sets of blocks made, but I WILL resume it soon. Healthwise, I'm now taking Methotrexate, and I'm tapering off the Prednisolone, so most days I feel almost like the old me. I don't have the energy levels though, so can't get quite as much done. I did manage to do quite a few World Textile Days last year and plan to be at all of them in 2022 (except the very first one). My online store keeps me busy too, and I'm working on a new book - which will have to stay under wraps for now!

So the stunning quilt in the photos isn't mine, but by Katherine Dugmore, who is a member of one of the Facebook groups I belong to. She used just three blocks from my book 'Japanese Quilt Blocks to Mix and Match' - Mitsu Tomoe (triple comma), 'Irori', and ?? (I can't spot which one this is!)


... maybe this, modified?


Katherine gave me permission to share the photo of her work in progress and wrote -

I had real trouble trying to find the striped fabric that would tie in with the galaxy fabric. Then decided the central block should look sun like so the mitsu tomoe worked really well.

I LOVED the blocks in her fabric choices, and the directonal speckled print looks fabulous for the 'irori' blocks - a great choice. It is hard to believe that there are only three blocks and four fabrics in this quilt, because the fabrics give it such variety, especially in the irori blocks.

The patterned fabrics are all Crafty Cotton, the plain purple I was given and they are all 100% cotton. The 'irori block is Rainbow Glitter for the stripes and the planets in the centre Space 1 Multi, the tomoe block has the Space 6 Multi with plain purple squares. There are only 4 fabrics in the quilt at the moment. All the patterned fabrics were bought online from Abakhan fabrics hobby and home.

Quilting hasn't been decided yet, but I could see this working with so many ideas. This is how I quilted my original Irori quilt (which was years between piecing the top and quilting it - you can't rush these things!)


I can't wait to see how Katherine completes her quilt! It is going to be her son's 21st birthday present. Lucky guy!

I've got rainbow effects on the brain at the moment. Olympus Thread Mfg. Co. have launched some fabulous new 100m sashiko thread colours today, and my stock is on its way right now, possibly arriving as early as Friday - I've got my fingers crossed that there won't be any delays this time.


I'm most excited about this thread, which I designed for Olympus. It is a true rainbow thread, and the colours are in the correct progression. I can't wait to stitch with it!


So you can probably see why I have rainbows on the brain today!

Wednesday 12 May 2021

First blog post after a long time!

Sorry I haven't been posting here for a while. I'm hoping to get things back on track soon.

Those of you who also follow my artist page on Facebook might have seen from some recent posts that I haven't been well on and off since September 2020. Actually, it has been going on for much longer than that - the photo above shows an episcleritic flare up in my right eye back in April 2016, and I had the first one in October 2015, when I was on a North Country quilting course with Lilian Hedley. I didn't go into the details at the time, but I was unable to do much on the course because my vision was quite badly affected. Each time, these eye flares had to be treated with steroids, and responded to that. I had another really big flare that lasted almost a month over Christmas and New Year.

On Good Friday a few weeks ago, I started feeling a bit odd and ended up with what my GP and NHS 111 assumed was an ear infection - but it wasn't. I ended up in hospital on 21st April, almost 3 weeks later, where I was diagnosed with Relapsing Polychondritis, a progressive auto immune diesease which is quite rare.

I have updated my website 'about me' page with some information about this, so please use the links there to read more about it (if you like) - https://www.susanbriscoe.com/about

At the moment, I am being treated with steroids, which is helping. It is a progressive disease and I will be able to less in future and take a bit more care of myself! So more work from home and less travel to teach or do shows looks likely.

Tuesday 3 November 2020

Selecting sashiko thread colours


Sometimes a sashiko panel works equally well with different colour combinations, but choosing which to go for can be tricky! I went through this process recently, to help some customers choose colours for the Seasons Greetings panels in green and dark indigo blue, by 'auditioning' different thread colours and taking some photos. The first photo (above) shows the green panel with 20m #51 (shaded green) and #26. Although #51 has parts that are almost the same as the green fabric, they are a slightly different colour and a very slightly lighter value, while the sea green, light sea green, white and shading sections would show up really well. These are 6ply medium sashiko threads, and for this panel I would stitch with them singly, not doubled, as that would be too thick. Each 'pine needle' has two rows of staggered stitches, so you stitch out from the branch and back again (very well thought out), and a doubled medium thread would make the pine needles much thicker than in real life.

Then I looked at the possibilities in the 370m fine sashiko thread range, which is 4ply thread. These would all show up against the green panel, because they are different green colours, but the value of #11 jade green is probably a little too close to the green fabric, so it might not show up as well. The dark green #15 would show up well and look like a very natural pine colour. #8 bright mid green, between #11 and #15, looked quite vivid against the green fabric, but looked good against the indigo blue. The all looked good against the indigo, and the contrast with #11 and #8 was much better. I think those colours would work well on the indigo, but maybe not so much on the green. I can't make up my mind about the varigated shade #F, which might work for the green but I think the dark section wouldn't show up so well on the indigo. The 370m shaded threads have very long 'pitch' or colour change compared to the 20m threads, so several adjacent needles would end up the same shade and colour, which might give a slightly clumped effect to the needles. Althoug it is a 4ply, I think using it doubled might be too thick for the pine needles, but I would need to experiment to be sure. Either used single or double, I think one skein would probably be enough for the tree.


Next, we have the 100m #107 light green 6ply medium. This is a slightly different green from the background fabric, and slightly lighter. It would make a subtle contrast, but isn't a natural green for a pine tree (but does that matter?)


20m #07 mid green (at the top in the next photo) is a different green again, maybe a bit more like the colour of a real pine needle, but perhaps doesn't show up strongly enough against the background. It would work well on the indigo blue. Unfortunately this colour isn't produced in 100m skeins (yet!), but it is available in 80m fine 3ply thread balls, as shade #207, and would suit being used doubled.


The vivid green 20m #26 makes a good contrast.


So does #77, which would introduce touches of blue into the greens, and look very vibrant.


Here are all the threads above shown with the green and indigo blue panels. It is a tough choice, and your Christmas decor plans would also influence which colours you use.


I have been thinking about using a different colour for the branches. These are all 100m threads. For some of the greens, #106 yellow ochre would be a good coordinate, and I think the darker greens would look good with #114 brown, which is perhaps the most realistic colour. I think white or cream would look lovely for the pine needles on either panel, perhaps with #113 light grey for the branches.


There are so many options. Who says your tree has to be a 'natural' colour? There are also some blues which look very much like pine, such as 20m #72. All these thread colours are available from my website. I'll have to make my mind up soon, because I need to start stitching!